


School administrators have been plagued with the impossibility complexity of configuring managed Chromebooks to authenticate with a RADIUS or 802.1X wireless network. Wireless networks configured with RADIUS are far more secure than those configured with a pre-shared key.
However, there are challenges for this type of authentication:
- Windows RADIUS interacts directly with Active Directory and it does not interact with Google Workspace at all unless:
- A Google Workspace AD Sync is set up
- SSO SAML authentication is setup
- Students have to KNOW their AD credentials (many schools don’t create AD accounts for students anymore)
- Two logins occur; one to authenticate with the wireless network, the second to authenticate on the managed Chromebook
- A portal method (like when you use hotel wifi and put in your room number) isn’t feasible unless the chrome browser is published as a kiosk app, which somewhat defeats the purpose of managing the Chromebook in the first place
- The one viable option that doesn’t require student interaction is to create an AD user account for every single Chromebook where the MAC address is the AD username. This is just a fancy form of MAC address filtering with two drawbacks;
- Mac address filtering is widely considered unsecure as MAC spoofing is incredibly easy
- The process is time-consuming and error-prone when creating each individual account.
Managed Chromebook RADIUS authentication is not easy. Luckily, we have developed a method that allows Chromebooks to authenticate with a windows RADIUS (or NPS) server with absolutely ZERO student interaction…seriously!
Here is what you need to setup Chromebook RADIUS authentication:
Prerequisites
- Windows NPS server (Microsoft calls RADIUS by the name of Network Policy Server or NPS)
- Active Directory Certificate Authority with at least SHA256. This has to be on a different server than NPS. One server can’t hold both NPS and CA Roles. If that isn’t available, it is beyond the scope of this article.
- Google Workspace Admin Console
- Creation of one service account and one service security group. We called our user account “ChromeStudent”. This is a regular AD account with no special permissions or access. Create a security group and make this user account a member of that group.
- 802.1X (or RADIUS) wireless SSID created, configured, and documented in your wireless system.
Certificate Authority Server
- Open up the Certificate Authority snap-in.
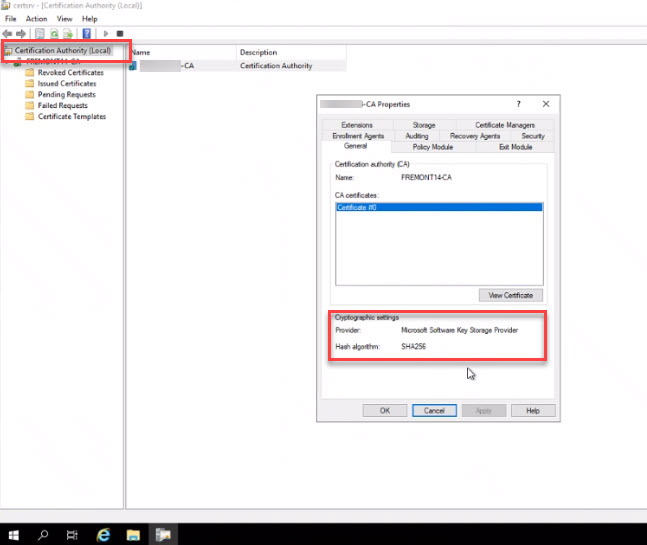
- Confirm the CA is at SHA256 We need to export the root CA certificate. You’ll HAVE to use Internet Explorer for this next step.
- Type in this url: https://<CA-server-name>/certsrv
- Click on “Download a CA certificate”

- Click through the warning box (if presented).
- Choose “Current,” Select “Base 64”, and click to download.
.png?width=503&height=661&name=MicrosoftTeams-image%20(6).png)
- Save this certificate, you’ll need it later.
We are using the root certificate of the CA of your Windows domain. This certificate validates that the windows user you created for this project is a member of the domain.
NPS or RADIUS Server
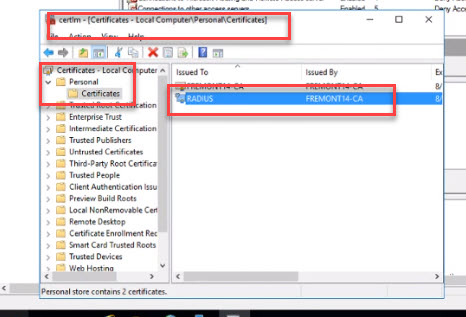
- Open the Certificate Authority console. Confirm that the NPS server you are working on has a valid certificate issued by CA server. A certificate is issued to all domain-joined computers & servers. Expand “Personal,” click on “Certificates” and confirm the machine cert is there. If the certificate isn’t there, you’ll have to go back and troubleshoot your CA.
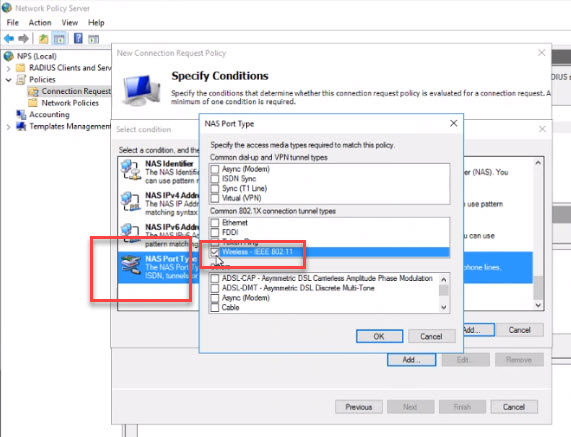
- Open up NPS Console, expand “Policies” Click on “Configure Connection Request Policies."
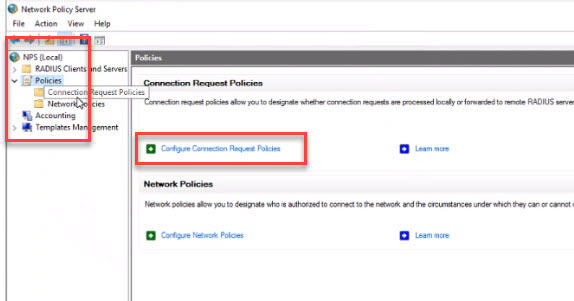
- Select “NAS Port Type” and click “Add” Choose “Wireless-IEEE 802.11” and click ok. This limits the types of connections to this RADIUS as just wireless devices.
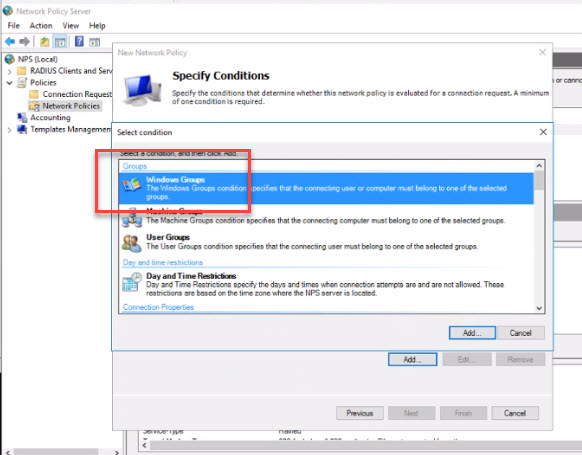
- Click on “Network Policies” right click and choose “New.” Give the policy a friendly name and click “Next.” Click the “Add” button to add a condition. Choose “Windows Groups” and click the “Add” button.
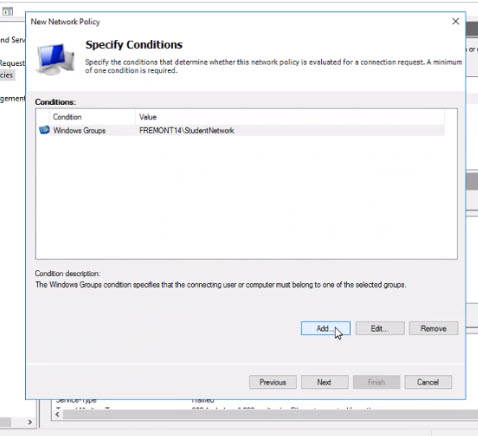
- Add the service group you created earlier. Click the “Next” button.
- Select “Access Granted” and click the “Next” button.
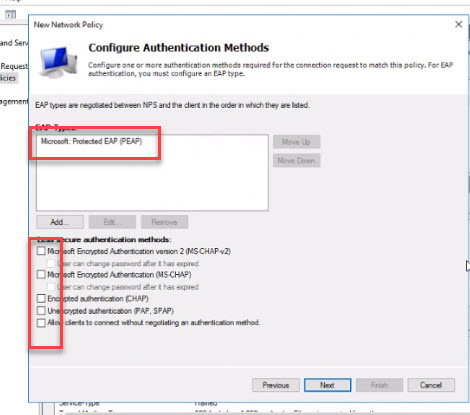
- For EAP types click the “Add” button and choose “PEAP.” Deselect all checkboxes and click the “Next” button.
- Click through the rest of the wizard with the default selections and click “Finish."
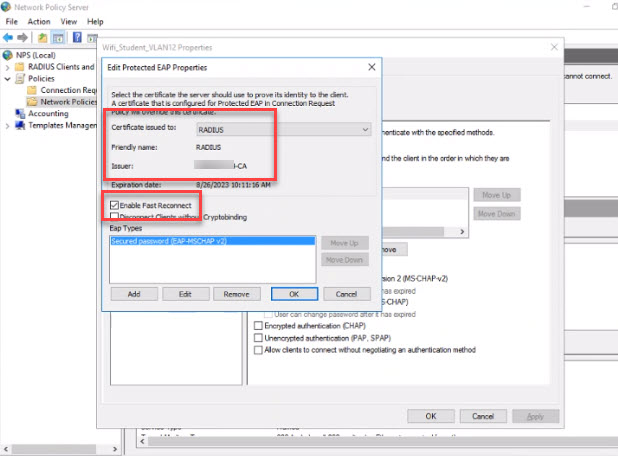
- Right-click the policy you just created and select “Properties.” Click on the “constraints” tab. Select PEAP in the EAP Types and click on the “Edit” button. Confirm the RADIUS server’s name, the CA server's name. Click on “Enable Fast Reconnect.” This is just a double check to make sure your NPS server is communicating with the CA server. Click the “OK” button.
- Depending on your brand of wireless access points and/or controller, you’ll have to add in the APs (or controller) into the “RADIUS Clients and Servers” area. Check your wireless documentation for this; it is slightly different for every brand/manufacture. This configuration is directly tied to the 802.1X wireless SSID you create and configure with a shared secret.
The Connection Request Policy confirms the request is coming from a wireless device. The Network Policy validates the certificate is from the root domain CA and the user credentials are tied to the correct security group. The “RADIUS clients and servers” configuration is wholly dependent on your wireless implementation.
Google Workspace Admin Console
- Log into the Google Workspace admin console with administrative privileges.
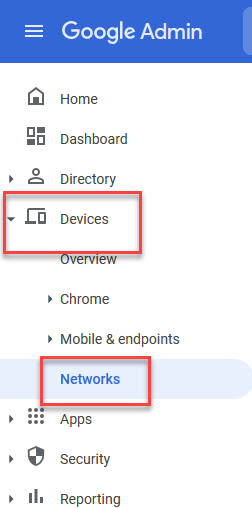
- Expand “Devices” in the left navigation tree. Select “Networks."
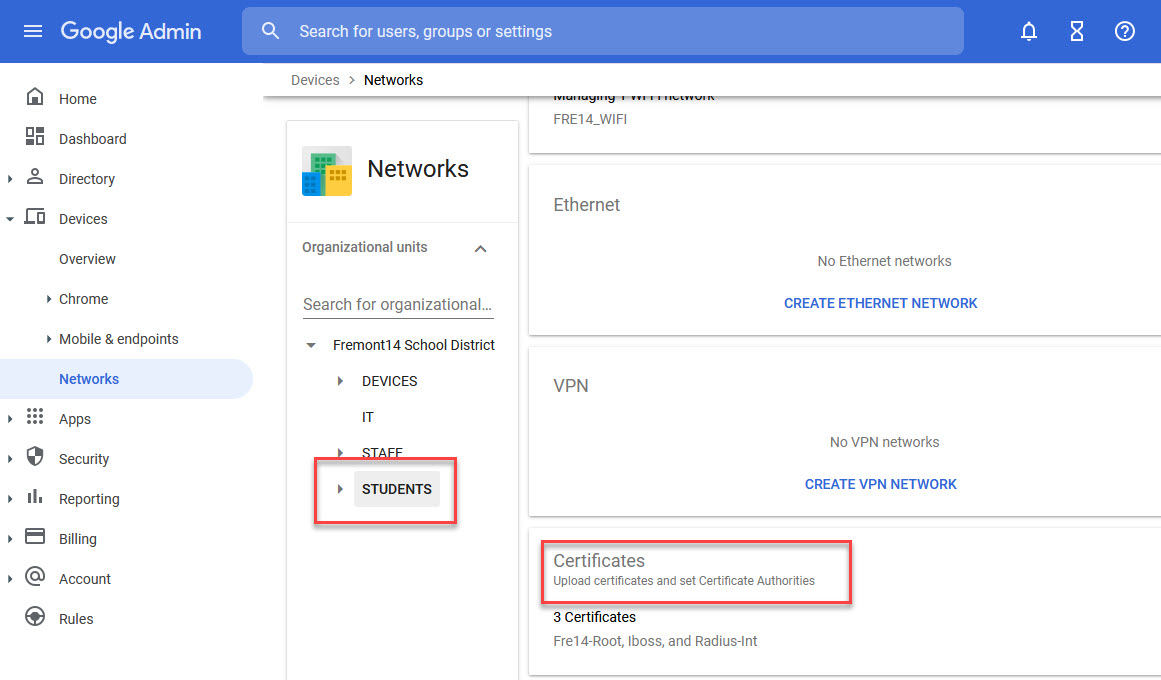
- In the middle navigation tree, select the OU where the devices you want to join the RADIUS SSID are located. In this example, there is a “STUDENTS” OU.
- Click on the “Certificates” section.
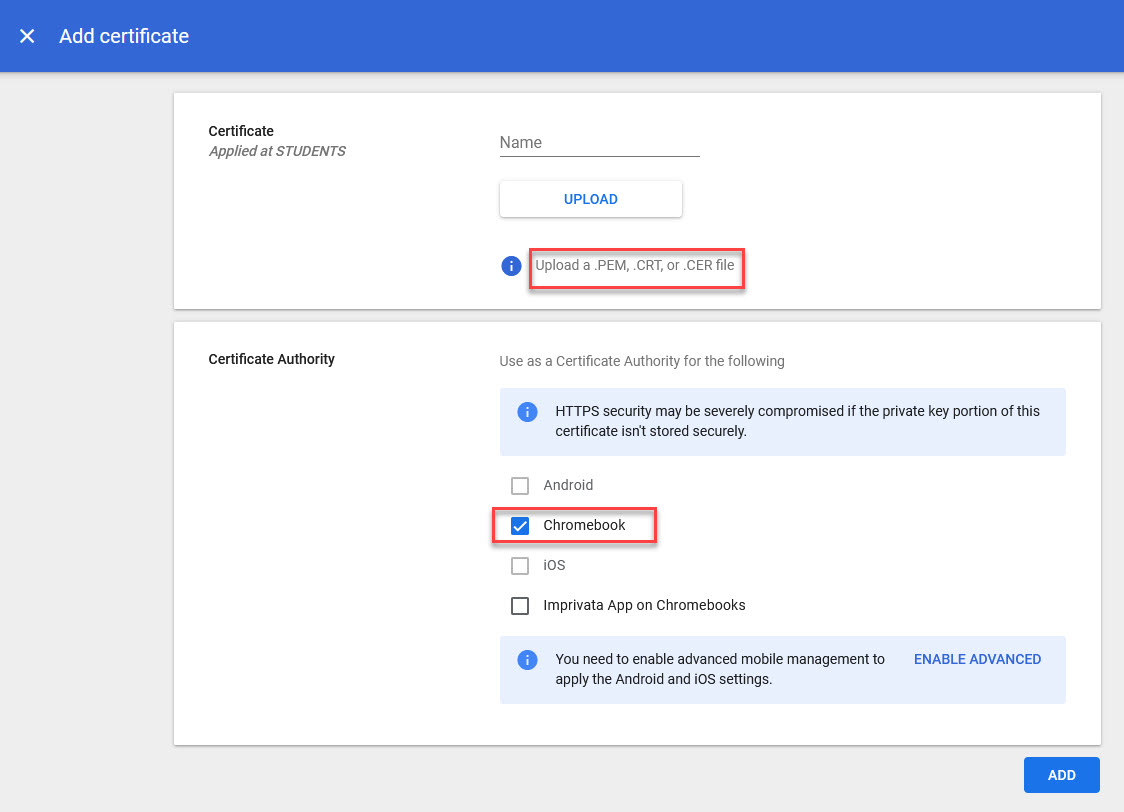
- Upload the certificate you exported from the CA. Give it a friendly name. Mark the checkbox by “Chromebook.” Click the “ADD” button.
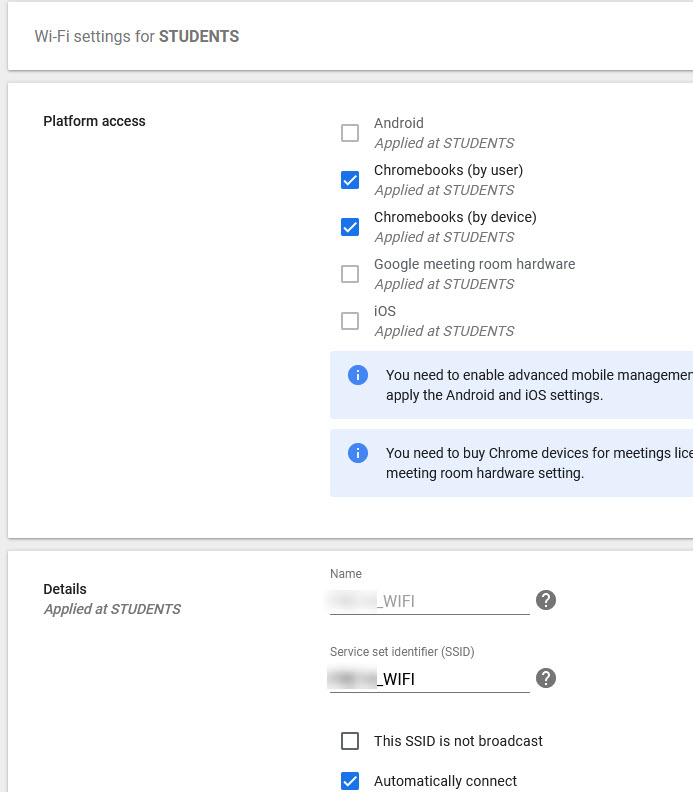
- In the middle navigation tree, select the OU where the student Chromebooks are located and click on the “Wi-Fi” area.
- Click “ADD WI-FI."
- Fill in the following settings:
- Checkmark by “Chromebooks"
- Name of wifi-network
- SSID of configured RADIUS network
- Checkbox by “Automatically connect”
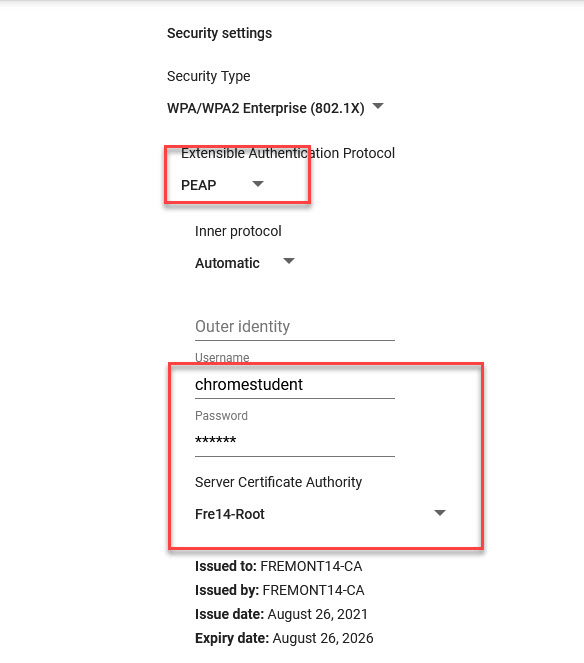
- Security types is “WPA/WPA2 Enterprise (802.1X)”
- Protocol is “PEAP"
- Inner protocol is “Automatic”
- Username/password is the service account you created previously. Put in AD username and password.
- Server Certificate Authority; select the cert you uploaded in step 5.
- IP setting, accept defaults.
- Click on the “SAVE” button.
- Test, test, and test some more.
The final step of the process is to upload the certificate to the Google Workspace admin console, configure the RADIUS wifi network to use the service account already created, and automatically connect to the RADIUS network w/the AD credentials, confirmed by the presence of the certificate provided by the domain CA.
Summary
While this solution doesn't allow for the user granularity that a normal RADIUS deployment would, it allows for automated deployment and added security utilizing certificates and Active Directory authentication - instead of simply using MAC addresses that can be spoofed or a WPA key that would allow anyone with the password access to your secure network.
We hope this will save you some time and headache in deploying wireless to your next wave of Chromebooks.
This blog was written by Kate Swistowicz and Morgan Pagett.


